Thursday, September 25, 2014

Exterior Befores and Afters

Aaaannnd we're back! Long, long break! I've got some exterior before and after pictures for you to see. These pictures are taken almost a year apart and right around the same time of day. We started our addition on October 29, 2013. We are completely finished with our renovation. There are a few things that we will be doing next year but it has to do with the landscaping and not the permanent structure. So here we go.

BEFORE

AFTER

  
BEFORE


AFTER


BEFORE


AFTER


AFTER


And there we have it! It's not 100% where I want it to be yet, but it's as done as it's going to be for this year. If you can't tell from the pictures, not only did we add an addition of an attached garage, but above that garage are two additional bedrooms, a bathroom, and a playroom. To the outside we resided the entire house, changed the color of the shutters, added stone to the front of the porch, and installed a new front door. Next year's plans include a new sidewalk, concreting the driveway and ripping out and redoing the landscaping. Also the entire side yard will be fenced in . All of those projects will require being hired out. They were on the schedule for this year, but by the end of the project the funds just didn't allow. :) We are extremely pleased and don't regret a thing we did!


Friday, March 14, 2014

The Bathroom Reveal!

Hey all! I've got a finished bathroom to show you! I'll leave a source list at the bottom of this post, but if I miss something and you have a question about something, just leave me a comment. On to the pictures!


As you can see these are the in progress pictures.


Annnnnddd all finished! Well finished ish. I'll still need to put a final coat of paint on the doors, and change the lightbulbs to clear ones. So it's 95% finished.


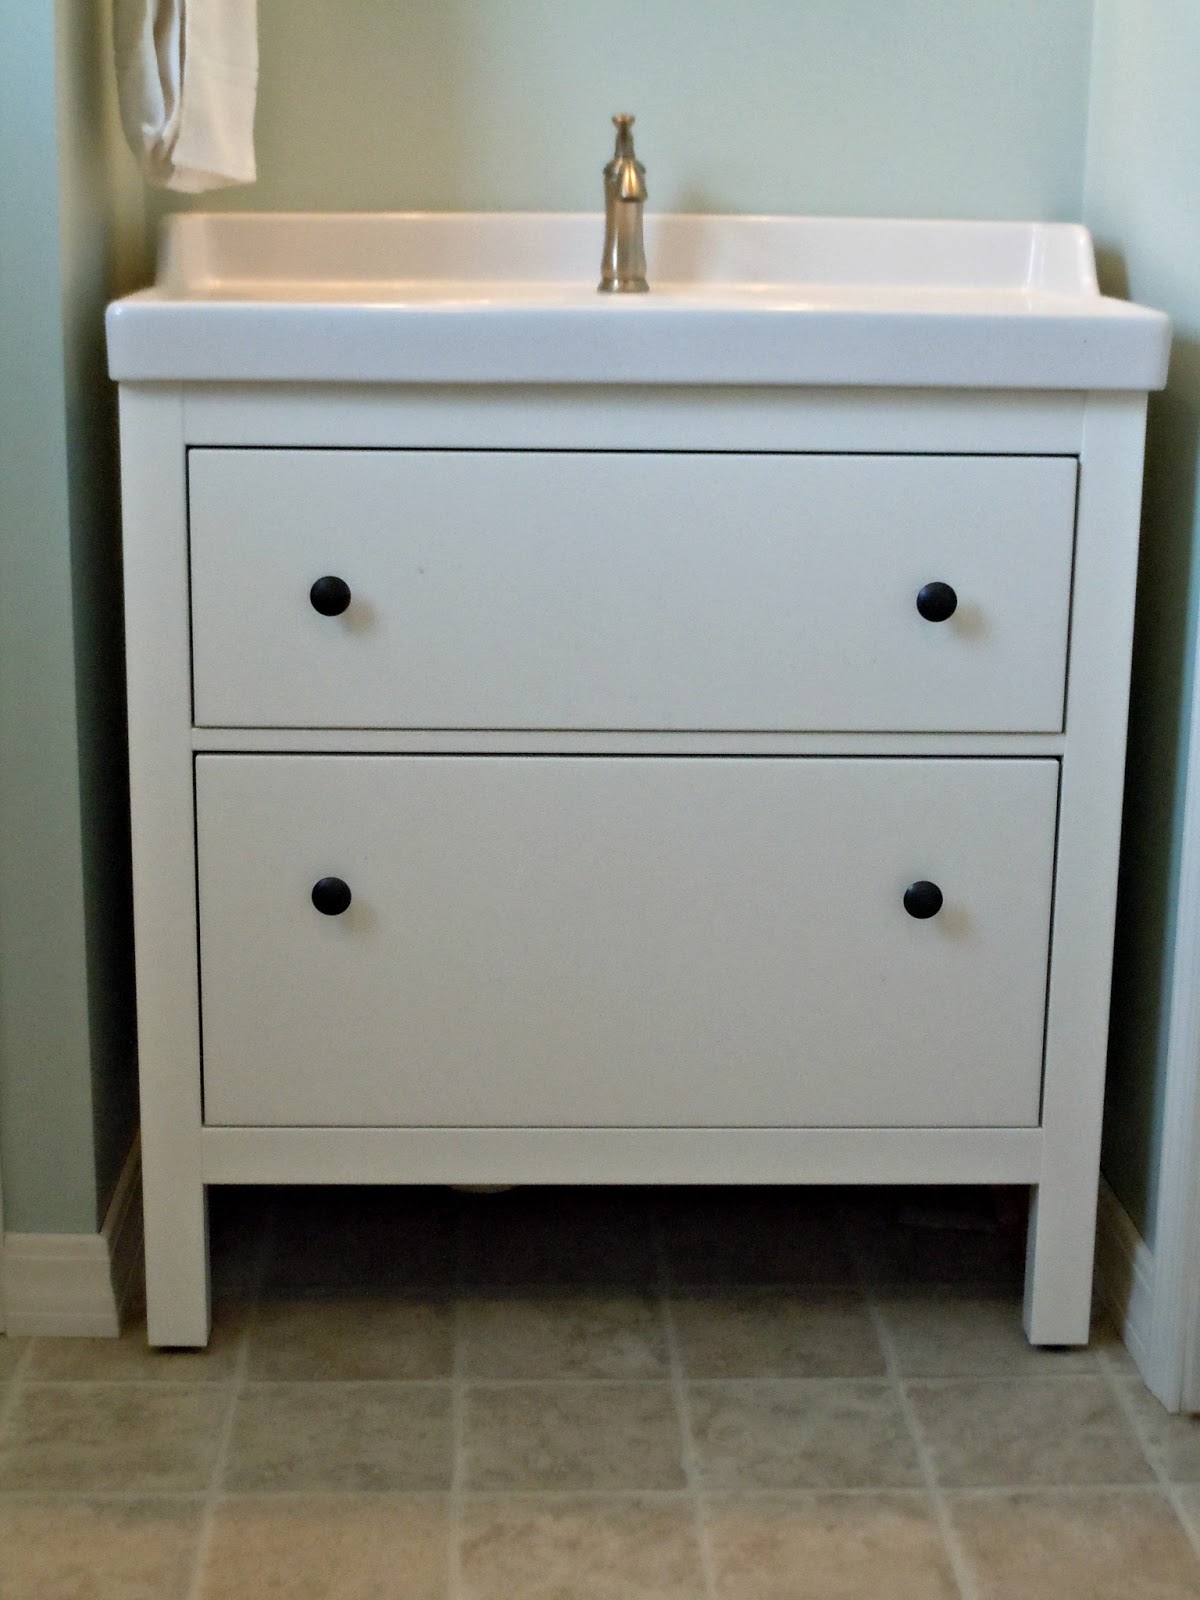
The vanity is from Ikea. I knew that I wanted drawers instead of cabinet doors. I find drawers to be more functional storage and since this is primarily my kids' bathroom, I wanted something that they could easily keep organized. I didn't want to see their toothbrushes, and hair brushes, and the like, always sitting out on the counter. This system makes it much easier to open a drawer and drop their things in. As a matter of fact, if I were to redo my kitchen again I would only have drawers, not cabinet doors, on the bottom.


The sink didn't come with the vanity but, it too, came from Ikea. It comes in different sizes and without the lip around the outside, if maybe you were installing it right up against tile. I also knew I wanted a one hole faucet. And I left off the plate that comes with the faucet. I prefer the cleaner look without it.


These vanity lights are actually exterior lights from Home Depot. The link that I included is not the exact lights that I used, but they are almost identical. I couldn't find the ones I bought. Dang I wish had some clear bulbs on hand!


As you can see in the picture, I chose to use hooks to hang the bath towels instead of a towel bar. Again, this was more about functionality than anything else. My kids aren't great at hanging up their towels yet, so in an effort to keep wet towels off the floor, I gave them each a hook and bought towels with a fabric loop so they would be easier for them to hang. Some of you might be questioning my white towels in a kids' bathroom. But fear not! I always wash my towels with bleach, so that's why the white.


And a little coral artwork. I always need a little something decorative in every room, no matter how small. These prints were actually the jumping off point for the room, and actually help inspire the wall color. Sorry about the terrible photo. The dark frames tie in to the dark framed mirror, and the dark knobs on the vanity, and provide a nice contrast to the lighter walls and all the white. And there you have it! I hope you enjoyed the pictures. My kids are loving their new spaces, and I'm very satisfied with the way things are functioning so far. If I missed any details you want to know leave a comment and I'll answer the best I can. Next time I'll show you some finished bedrooms!


     Source List
  • Wall color is Rainwashed by Sherwin Williams
  • Vanity, sink, towels, and coral prints are from Ikea ( also see above links)
  • Toilet is American Standard from Lowe's
  • Faucet is Pfister from Menard's
  • Floor is a vinyl remnant 


Tuesday, February 11, 2014

Stairs and Mood Boards...

Hey hey! It's been awhile! Progress has been happening, but not things that are noticeable. New water lines, lots of finish work on the drywall, plumbing. So today I'm showing you a couple pictures of the new stairs and the mood boards for the kids' rooms. The stairs post would not have been lengthy enough for its own post, so I'm combining the two for what will  probably too lengthy. ;) The stairs took a lot of engineering and lots of contemplation for the best location. It also had to be determined whether the stairs would be a straight run, or whether the would turn to the right, and continue into the playroom. So here's what we ended up with.


There were built in bookcases on the side of my fireplace, and that provided the new location for the stairs. A side note, these usually held family photos and decor items before I removed everything. I don't typically decorate with old paint cans.


Behind this tarp it's open to the garage. It was so weird!


And this is the work in progress.


And now on to the mood boards! I'm going to show you the colors and some of the accessory items that will be making up the new bedrooms. My son is very in to construction. Way in to. And he received two construction equipment posters for his birthday. So those were kind of the jumping off point for his room. I also wanted a few industrial elements for him as well. When I started to imagine what these rooms would look like, I started thinking about things that would grow with them. I've never been in to themey rooms and things that scream juvenile. As you can see, he and I choose brown and taupe bedding. He is a boy after all, and I think he manufactures dirt in his sleep. The orange color is an accent wall (which is named Under Construction) that his bed will be up against, and the sand color is for the other three walls. I'm typically not an accent wall person, but I also wanted to temper the orange. So far I'm happy with it, but I don't have the room set up yet. One of the things I do really like about the orange is when the sun comes up it reflects around the room and it looks like a sun rise! I have to say, most of this room was my choice, with some consultation from him. He's a total boy and was happy with just about everything I showed him.


The princess was a different story. When we started to think about my daughter's room the initial color choices were either pink and gray, or lavender and gray. We hadn't made a final decision until one day I walked into Lowe's. And there was the lampshade in the mood board. I loved it! I thought it was perfect for girls room, and she liked it too. It had all the colors in it that I was thinking of using. So then it was on to try and find bedding. I was looking for something inexpensive, but cute. Again, not juvenile, but not something for an adult. I think what I found is perfect for what I had in mind. The paint color was a whole different animal. Because I had purchased the bedding first, I needed to find a coordinating lavender shade for the walls. What I had picked out first was too cool. The gray in the bedding is more of a warm gray. So we were walking through Lowe's one day, and my daughter spotted Pantone's color of the year-Radiant Orchid. Oh, mother of God. I liked the color at first. But once I saw it on the wall, yikes! I couldn't imagine four walls that color. And thankfully she changed her mind when she saw it on the wall. If she really, really wanted it though, I would've let her do it. And what we ended up with turned out very pretty.


I will be upholstering her headboard myself, similar to what is in the picture. I did my own a few years ago and I'm happy with how it turned out, and how it's held up. My son's bed is what I consider an heirloom. My grandpa made me that bed when I bought my first "grown up" mattress. It is queen sized, and we have since upgraded to a king. But I always knew I would be passing it on, and  I'm happy for my son to use it. The next time I show you these rooms, they will be complete!


 Source List

  • Paint is from Lowe's
  • Daughter's light is from Ikea
  • Son's light is from Ikea
  • Daughter's bedding is from Overstock.com in gray
  • Son's bedding is from Ikea in brown

Tuesday, January 7, 2014

Drywall Y'all!

Hey everybody! The plan was to take a break over Christmas. But then the sickness came. And it hit hard. I was in bed with bronchitis for four days. I also contaminated my children, even though my mom was nice enough to quarantine them at her house. We are all on the mend now, with the exception of a lingering cough, that sounds like I have black lung after I wake up in the morning. So anyway, I have some pictures of drywall for you. Very glamorous I know! But it makes everything look like actual rooms now.


This is looking into the bathroom from the playroom. You can see the side of the shower and tub (with the numbers on the side) and you can see the framing for the pocket door.


Inside the bathroom. Directly across from the tub will be the vanity.


This is the view of the playroom from near the bathroom door. It's a touch dusty up there, as you can tell by all the dust orbs showing up in this picture.


Here's a better view of the kids' bedroom doors in relation to the playroom. The hole in the floor with the ladder sticking out is where the stairs are going to go. It took a lot of thought as to how those stairs were going to connect to the existing part of the house. And we didn't know if they would be a straight run of stairs or if they would need to turn. We ended up with a straight run, and that was what I was hoping for. The straight run gives a little more room in the playroom, and getting furniture up there should be easier.  


This is my son's room.


And a view of my son's closet.
And apparently I don't care about my daughter's room since I don't have pictures of it to show you. But it's a carbon copy of my son's room. 
So there you have it! It looks like a house now! There's probably only another three weeks of work to go at this point. That is, until we move on the ripping out walls in the existing part of the house. Until next time...